
Where to Begin: A Step-by-Step Guide to Deep Retrofit for Existing Homes
In our recent blog post, What to Look for When Renovating a Home to Passivhaus Standard: Insights from Simone, we explored the key things to look for when buying a home you intend to retrofit. From solar access and moisture concerns to construction types and layout considerations — it covered the early, high-level decisions that can make or break your renovation journey.
But what happens after you’ve purchased a home and you're ready to start making upgrades?
For some, the answer might be a full renovation and extension done all at once with the help of a builder — and if that’s your situation, you may not need to read on.
But for many others, the journey looks a little different. You might be upgrading your home in stages — a bit now, a bit next year — working with what your time, budget and lifestyle allow. And that’s completely okay. Every small step you take makes a difference.
This is where deep retrofit planning becomes your best friend.
In this blog post, we’ll walk you through what a deep retrofit actually is, and how to sequence your upgrades for maximum impact. So whether you’re taking it step-by-step or planning ahead for the long haul, you’ll know exactly where to begin.
What Is a Deep Retrofit?
A deep retrofit is more than just replacing your windows or topping up the insulation. It’s a holistic, strategic upgrade of your home’s building fabric and systems — with the aim of dramatically improving comfort, reducing energy use, and ensuring long-term durability.
Deep retrofits go beyond surface-level fixes. They address:
- Heat loss and gain
- Airtightness
- Insulation performance
- Ventilation and indoor air quality
- Moisture management and durability
And the good news? You don’t have to do it all at once. If you’re taking a staged approach, we’ve mapped out a sensible sequence for how to tackle your retrofit step-by-step.
Where to Begin: Your Step-by-Step Deep Retrofit Guide
1. Seal the Gaps: Caulk and Seal Penetrations
Start with the low-hanging fruit. Sealing around plumbing, electrical, and service penetrations through your walls, floors and ceilings is an easy, cost-effective way to improve airtightness. Silicone or caulking can be used to fill gaps where air leaks in — or out.
Why this matters: Even small air leaks can cause significant heat loss and introduce moisture, which can lead to mould. This simple step can drastically improve comfort and energy performance.
2. Draught-Proof Your Ventilation Pathways
This includes:
- Installing self-closing exhaust fans in bathrooms and kitchens
- Adding weather seals to older windows and doors (especially if you’re not ready to upgrade them yet)
- Sealing off open fireplaces or unused chimneys
Why this matters: Uncontrolled ventilation (aka draughts) leads to uncomfortable cold spots, unnecessary energy loss, and inconsistent indoor temperatures.
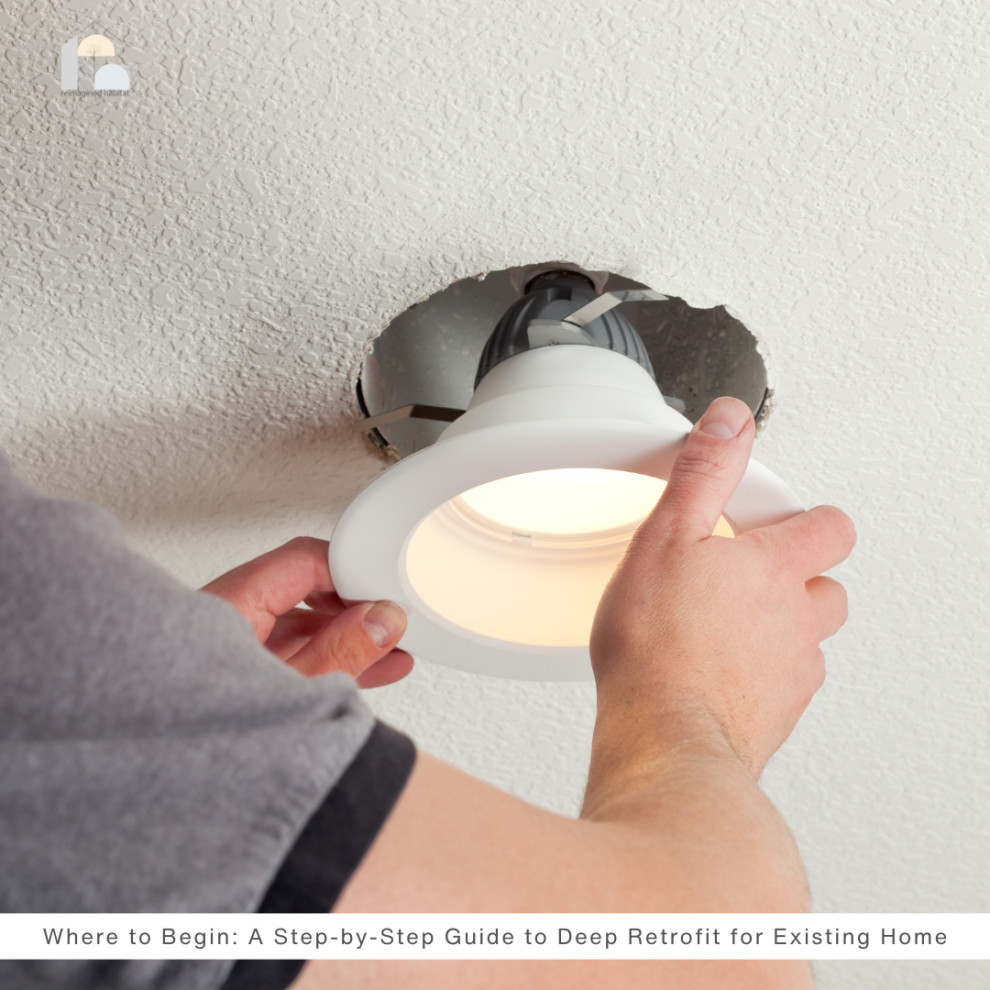
3. Seal Up Ceiling Penetrations
Ceiling penetrations are often overlooked, but they’re a major source of unwanted air leakage. Be sure to:
- Close off old evaporative cooling vents
- Replace or seal around recessed downlights
- Fill gaps around ceiling penetrations and light fittings
Why this matters: Your ceiling often connects directly to your roof cavity, which can be a source of extreme heat or cold. Sealing these up keeps your conditioned air where it belongs.
4. Remove Old Heating and Cooling Systems
Dated systems not only underperform, they can also create pathways for air leaks or introduce condensation risks. Consider decommissioning old gas heaters, flued appliances, or wall-mounted AC units as part of your retrofit plan.
Why this matters: Legacy systems are often inefficient and may work against your new building fabric upgrades.
5. Improve Your Wall Insulation
If you’re re-lining internal walls or removing cladding, now is the time to insulate properly. Choose insulation with the right R-value for your climate and make sure it’s installed to avoid gaps or compression.
Why this matters: Wall insulation reduces heat flow, lowers energy bills and improves indoor comfort — especially in extreme weather.
6. Insulate and Seal Your Floors
If you have access to the subfloor, install underfloor insulation and make the floor airtight using appropriate membranes or sealing products.
Why this matters: Cold draughts from below can make your home uncomfortable and increase heating demand. Airtight, insulated floors are a game-changer — especially in timber-framed homes.
7. Improve Wall and Roof Airtightness
Use membranes or wraps to create a continuous airtight barrier around the home — and tape all joins, junctions and penetrations thoroughly.
Why this matters: A well-sealed envelope is essential for managing indoor air quality, temperature and moisture. Airtightness is a core principle of the Passive House standard for a reason.
8. Install High-Performance Windows
This is often one of the more expensive steps — but it’s worth it. Replace old single-glazed windows with high-performance double or triple glazing, ideally with thermally broken frames.
Why this matters: Windows are a major source of heat gain and loss. High-performance glazing reduces energy demand, blocks noise, and improves comfort year-round.
9. Add a Heat Recovery Ventilation System (MVHR)
This is a critical final step. Once your home is airtight and well-insulated, you need a mechanical way to maintain fresh air — without compromising comfort or efficiency. MVHR systems bring in filtered, fresh air and expel stale, humid air — recovering up to 90% of the heat in the process.
Why this matters: Without mechanical ventilation, airtight homes risk trapping humidity, which can lead to condensation, mould and poor air quality. A well-designed MVHR system solves that — keeping your home healthy and fresh.
Important: Steps 8 and 9 should be done together — or as close together as possible. Once your home is well-sealed, you must ensure fresh air supply and humidity control is handled properly.
Final Thoughts
Not everyone can do a full Passive House renovation in one go — and that’s okay.
Every upgrade you make contributes to a healthier, more energy-efficient home. Whether you’re sealing gaps, replacing systems, or slowly insulating room-by-room, these steps are all part of a bigger journey.
Deep retrofits aren’t just about cutting bills — they’re about creating spaces that feel better to live in.
And remember: the earlier you plan your retrofit sequence, the easier it is to avoid costly rework down the line. So take it one step at a time, and keep the end goal in sight — a home that’s built for comfort, performance, and wellbeing.
Want help mapping out your retrofit? Get in touch — we’d love to help you plan it properly.